Add Link pane
The Add Link button on the ActiveLink ribbon in Microsoft Word displays the Add Link pane in the Index panel, Add Link tab.

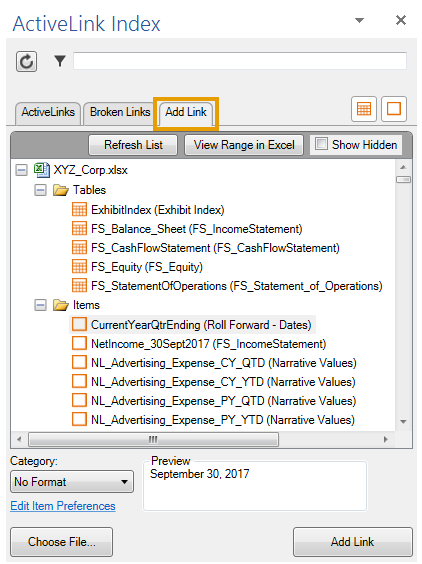
The Add Link pane lists the named ranges (Tables in the figure below) and named cells (Items in the figure below) from Excel that you can add to a Word document. Only named ranges from open Excel files are displayed in this tab.
The Add Link pane includes the following options:
- Refresh List: Updates the list of named ranges in any Excel files that are currently open.
- View Range in Excel: Allows you to view the named ranges for an Excel file that is not currently open.
-
Add Link: Inserts the selected item link or table link into the document.
Note: You can also double-click an item link or table link to insert the link into the document.
- Show Hidden: Select this option to display hidden named ranges. Named ranges that are hidden in Excel do not appear in the Add Links pane. It’s presumed that they are hidden to prevent inadvertent use. ActiveLink will not allow you to link a hidden named range to a Word file.
- Choose File: Allows you to open an Excel file and add links from it to the Word document.
Item Link Options
When you select an item link from the list of links, the Add Links pane includes the following options:

-
Category: Includes five options for applying formatting to the linked data in Word: No Format, Number, Currency, Percentage, Date, and Paragraph.
With No Format (the default), the item appears in Word as it is formatted in Excel.
Note: When you add an item link that includes a http or https hyperlink, you can only apply the No Format option to this link. If you apply a different formatting option to the link after adding it, the hyperlink will be removed in Word. To restore the hyperlink, change the formatting category back to No Format and refresh the item link.
- Preview: Shows how the data will look in Word for each of the categories.
- Edit Item Preferences: Displays the User Item Preferences dialog box from which you can modify the formatting for each category.
Table Link Options
When you select a table link from the list of links, the Add Link dialog box includes the following options:

-
Table Width: All tables are added to Word using relative percentage formats for table width. You can choose a value ranging from 100% (the table fills the width of the Word document) to 50% (the table fills only half the width of the Word document). You can also select a custom size and enter any percentage from 100% to 1%.
Note: The Table Width option is available only when you select a table from the list of links.
- Column format: Choose the format to apply to numeric tables.
- DFS Format: Use this option to apply an DFS traditional financial style to your tables for numerical columns and borders.
- DFS Full Line Format: Use this option to apply an DFS traditional financial style to your tables for numerical columns with continuous borders.
-
No DFS Format: Use this option to bring your Excel tables into Word as they are formatted in Excel.
To see examples of each format, click the question mark icon (
 ) next to the Column
format drop-down.
) next to the Column
format drop-down.Note: The Column Format option is available only when you select a table from the list of links.
-
Alignment: Sets the horizontal alignment of a table in Word. You can select from Left, Center, or Right.
Note: The Alignment option works in tandem with the Table Width option. A table that is set to a width of 100% appears the same in Word no matter which Alignment setting is used (this is because the table is formatted to cover the entire width of the page). However, if you set the table width to a value of less than 100%, the alignment of the table follows the selected alignment.